Elefant
Aus PerlenWiki
| Elefanten sind großartige Tiere - inspiriert von einem Besuch im Kölner Zoo entstanden meine ersten Elefanten. Grundsätzlich finde ich es wichtig immer wenn ich ein Tier perle mich vorher zu fragen, was ist das Wesentliche dieses Tieres. Vielleicht auch ein paar Bilder anschauen um eine Idee der Anatomie und Proportionen zu bekommen. | 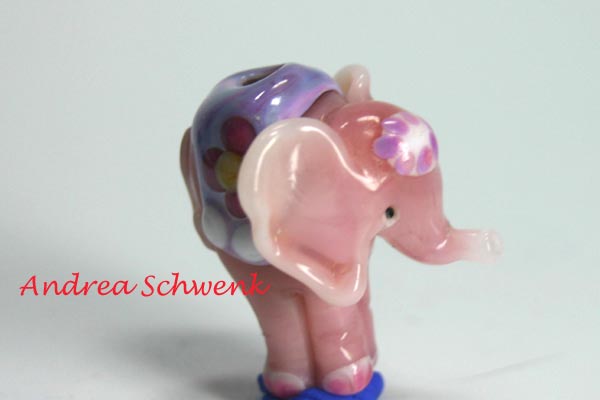 |
Elephants are wonderful animals - inspired by a visit to Cologne Zoo I created my first elephants. Basically, I think it is important whenever you make an animal, ask yourself what is the essence of that animal. Perhaps a look at some pictures to get an idea of the anatomy and proportions. |
| Schritte | Foto / Picture | Steps |
|---|---|---|
| Ihr braucht eine feine Klinge Utility Blade oder ein Skalpell, einen Amalganstopfer (schenkt Euch mit etwas Charme Euer Zahnarzt ;-) ), einen Graphitmarver , eine Pinzette ohne Rillenprofil und eine Abflachpinzette. Dazu graues Glas (hier perlgrau Vetrofond) und jeweils einen Stringer aus Elfenbein und Schwarz. | 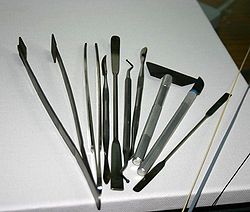 |
You need a fine utility blade or a scalpel, a tool with a round hat ca. 2mm in diameter ( I got it from my dentist;-)), a Graffitmarver, tweezers with profile and without. This gray glass (here Vetrofond pearl gray) and one stringer of ivory and black (i prefer CIM hades for eyes). |
| Zuerst schmelzt ihr einen kleinen Blob und quetscht ihn mit der Abflachzange flacht beim Abschmelzen. Das werden die Ohren macht besser 3 oder 4 weil sie manchmal zerspringen und legt sie auf die Vorwärmplatte. |  |
First, it melt a little blob and squeeze it with my flat pliers during melting. These will be the ears. You better make 3 or 4 because they might breake, keep them warm on your top marver. |
| Und nun geht’s los: Zuerst einen ca.2 cm große Kegel auf den Dorn wickeln und formt ihn mithilfe des Marvers. | 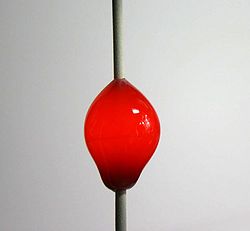 |
And here we go: First wrap a depth of 2 cm large cone on the mandrel , forming it using the Marvers. |
| Diesen dann an 2 gegenüberliegenden Seiten abflachen (das sind die Flanken des Elefanten) |  |
Then flatten them to two opposite sides (these are the sides of the Elephant) |
| Nun heizt ihr den Bereich der Beine auf und drückt mit dem Skalpell an die abgeflachten Seiten jeweils eine kürzere Einkerbung in das Glas.
Für das Kopf- und Schanzende des Elefanten werden die Einkerbungen etwas länger. Nun mit dem Elfenbein ein paar feine Dots für die Zehennägel machen und flach schmelzen. |
 |
Now heat the area of the legs and press with a scalpel on the flattened sides the shorter notches in the glass.
For the head-end and the backside of the elephant the notches are a little longer. Now make with the ivory a few fine dots on the toe nails flat and melt. |
| Für den Kopf einen dicken Blob schmelzen und diesen auf den Körper setzen, der Rüssel entsteht beim langsamen abschmelzen. |  |
Melt a big blob for the head and set it on the body, the trunk is slowly formed by melting the cane up. |
| Nun schnappt Euch mit der Pinzette ein Ohr und haltet es so das der Zipfel nach unten zeigt. Den Bereich am Kopf aufheizen und das Ohr langsam wedelnd in die Flamme bringen und an der Seite anschmelzen….. und andocken….. Die Ränder mit kleiner spitzer Flamme schön glattschmelzen und die Ohren mit der Pinzette (ohne Profil) formen. | 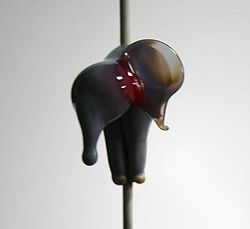 |
Now you grab an ear with your tweezers and hold with the tip pointing down. Heat the area at the head where the ear should be and melt it on it´s place by the ear slowly wagging it into the flame. The edges smooth with a small pointed flame to melt beautifully and form ears with tweezers (without profile). |
| Nun die am Platz der Augen vorsichtig punktuell aufheizen und mit dem schwarzen Stringer einstechen, pusten und abbrechen. Dann noch mal kurz anheizen- damit die Bruchkanten sich abrunden. |  |
Now the heat the place where the eyes should be carefully and poke with the black stringer, blow and break off. Then heat the eye again to round off the sharp edges. |
| Den Rüssel vorsichtig und gleichmäßig aufheizen nach oben biegen und in die Spitze einmal kurz mit dem Amalganstopfer tupfen (so bekommt sie die typische Form). Den Schwanz mit einem Stringer aufmalen und bis zum Scheitelpunkt der Stringermalerei runterschmelzen. | 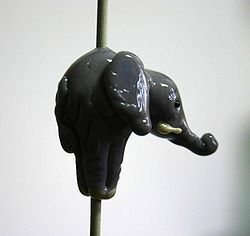 |
Heat up the trunk and gently turn up and pat evenly into the top briefly with the tool from your dentist (it gets the typical form). Paint on the tail with a stringer and of the melt down a little. |
| Nun mit der Klinge immer wieder vorsichtig kleine Linien, Falten an Rüssel, Po und Beinen machen. Dazu immer wieder eine Bereich vorsichtig aufheizen und sanft mit der Klinge eindrücken. | 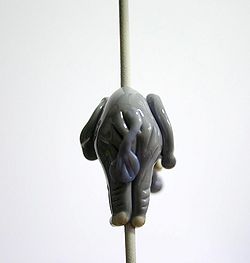 |
Now make careful fine lines with the blade , wrinkles on trunk, buttocks and legs. |
| Törö…… fertig……ist Eure erster Elefant, ich finde es ganz witzig eine Familie in unterschiedlichen Größen zu machen….. Viel Spaß damit!!! | 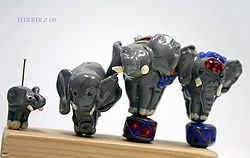 |
Törö ready ...... ....... is your first elephant, I think it's quite funny to make a family in various sizes ..... Have fun with it! |
Link zum Originalbeitrag auf Andreas Blog: [1]